
Wondering how to get started with breadmaking? You’ve come to the right place! I’ve put together a beginner’s guide to making bread to help you get to grips with the basics, so you’ll be making beautifully-baked loaves of homemade bread in no time.
In our house, we love homemade bread. (Let’s be honest, we love baked goods in general!) I bake several times a week and have done so for the last few years. I don’t even need to measure out some of my go-to recipes anymore (like our everyday bread), and I love experimenting with different grains and types of flour.
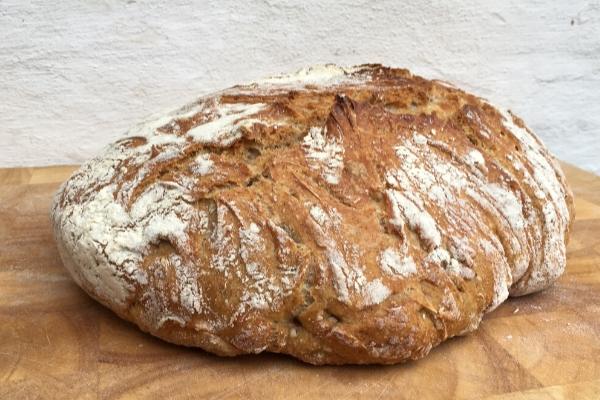
To me, one of the best things you can serve your family is homemade, warm bread, fresh from the oven. The smell that fills the air when a good loaf of bread is in the oven…..ahhhhh…..well there’s just nothing like it!
How to Get Started With Making Your Own Bread
Making your own bread can seem daunting at first. What equipment do you need to make bread? Which type of yeast is best for your bread? Do you actually need yeast? Should you knead bread dough by hand or with a machine? How long should you leave bread to prove for? How do you know when your bread is cooked?
Breadmaking is a craft that takes time and a little patience, but trust me, it really isn’t as difficult as it seems. With a little practice and the help of this guide, you’ll soon be able to make delicious homemade bread for your family and friends.
Why Make Your Own Bread?
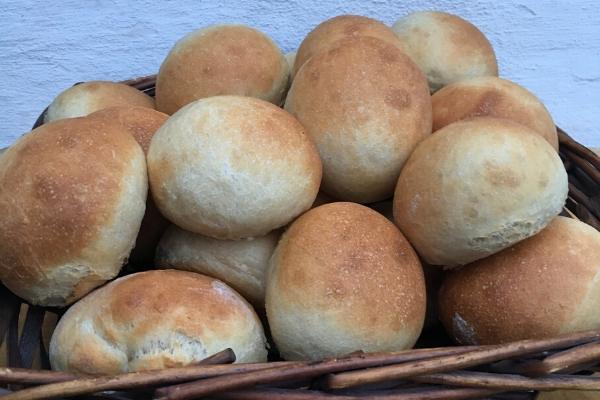
Baking is one of my favorite ways to relax. I might start a sourdough from scratch or maybe make bread rolls. If burgers are on the menu, I’ll whip up some homemade buns, and if I’m feeling in the mood for something sweet, I’ll go for cinnamon swirl bread. I’ve also got a fantastic recipe for cheap, everyday bread that’s always a hit.
For me, it’s a form of meditation. Nothing to concentrate on except measuring, mixing and kneading, keeping me focused and mindful. Not to mention how satisfying it is to serve up a piping hot, fresh loaf of bread to your guests.
Our house is known for being a place where there is always great homemade bread, and I’ll admit – there’s a certain sense of satisfaction that comes from being able to pull a freshly-baked loaf from the oven to serve to my family. I know that it’s made with good quality ingredients, no additives or preservatives, AND it’s cheaper than buying a sliced loaf from the store. Win-win!
In this post, I’ll cover the most important steps I take when making my own bread. Now bear in mind… I don’t have any formal training in baking, just experience, and perhaps a bit of a natural eye for it.
Honestly – it’s all about practice. If you have any questions, feel free to leave them below in the comments, and I’ll do my best to help you out.
What is Breadmaking?
Put simply, making bread is the art of turning flour, water, raising agent and a pinch of salt into a warm, soft loaf of goodness that melts the butter as soon as it touches it. Ah, how bread and butter always gets me – it’s my kryptonite. 🙂
Breadmaking is one of the oldest ways of preparing grains that we know. Making your own bread takes you back to simpler times, gives you a chance to get creative, and gets your body moving too (assuming you don’t have a machine to do the heavy work).
Sounds surprising, I know, but breadmaking can be physically hard work and involve a bit of heavy lifting too. There are ways you can make your life easier in that regard, and I’ll talk more about that later in the post.
Breadmaking Essentials – The Basics
When it comes to breadmaking, you don’t need much to get started. First, let’s talk about ingredients. For a basic loaf of bread, all it takes is flour, water, salt and raising agent – usually yeast (wild or store-bought).
As with anything else, you’ll get the best results if you work with the best quality ingredients. When buying your ingredients, look for flour that is high in protein. It’s the protein that helps create strong gluten strings in your mixture – these are essential for creating pockets of air inside your bread.
Quick Tip – if you’re making sourdough bread, make sure that you bake with water that’s chlorine-free, as chlorine will kill off any natural fermentation that is going on.
When it comes to equipment, you’ll need a bowl to mix it all, a measure to make sure you have the right quantities of ingredients, and then a spoon or your hands to mix it all up. You’ll also need a clean surface to work your dough on and then a container to bake your bread in.
Once you have prepared the dough, you need to decide how you’re going to cook your bread. You can use an oven, a Dutch oven over your campfire, a baking stone…you can even experiment with deep-frying the dough on a hot pan. The choice is yours.
And that’s really all the basics you need to start baking your own bread. Yes, there’s so many tools and pieces of equipment out there to help you bake a perfect loaf of bread, but these are “nice-to-haves” rather than essentials.
Breadmaking Tips for Beginners
You don’t need fancy tools and equipment to get started
I wish someone had told me just how easy breadmaking is. When I first got started. I thought I would need all sorts of fancy equipment and expensive tools to make a decent loaf of bread. It’s definitely not the case. While you can spend a lot of money on equipment to make bread, you really don’t need to – you can start off with just a bowl and a spoon.
If you’ve got time – prove twice
Almost all bread becomes even better if you allow it to rise twice – once cold and once warm. I don’t always have time for that, and you can skip the extra step and make really good bread in a couple of hours, but now and then, I go all in and allow the dough to rise for up to 24 hours in total, and the end result is very different bread.
There are ways to make life (and breadmaking) easier
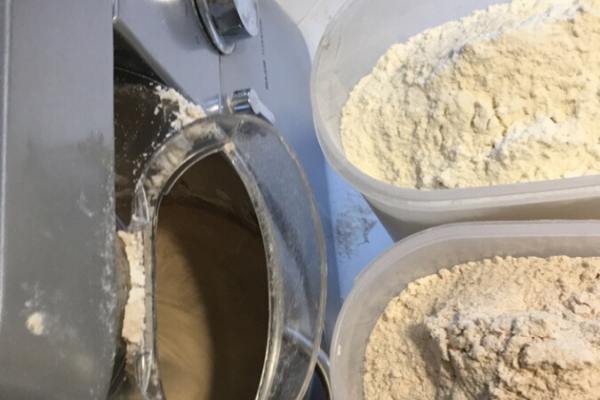
My kitchen stand mixer saves me time and effort when it comes to kneading my bread. While there are “no-knead” bread recipes out there, kneading your dough helps introduce lots of air into it, making for a lighter loaf.
Some of the best bread is made when you leave your dough for the time it takes on a kitchen machine (often as long as 45 minutes), which really brings out the gluten strings in the dough. Combine that with plenty of rising time, and you’ll get some of the best bread in the world.”
Watch your measurements
After a while, you’ll get the hang of exactly what ratio of ingredients works best for your bread, but when you’re just starting out, it’s best to stick carefully to the measurements in your recipe. When it comes down to it, successful baking is all about the science, and if you go too far from the basic ratios, that chemical reaction you need for the perfect loaf just isn’t going to happen.
Beginner Breadmaking FAQs
How do you make simple bread?
Stick to the basics – you can make simple bread with good-quality ingredients and a straightforward recipe. Water, yeast, salt and enough flour to make it all stick together.
Can you knead bread by hand?
Yes, you can! And it’s a good workout! It’s all about creating really strong gluten strings in the flour. If you knead your dough by hand for about 20 minutes, you can create a strong network of gluten strands. This is hard work, and if you need a break, you can leave it for 3-5 minutes and then get back to it.
Is it cheaper to make your own bread?
My guess is that it depends on where you live in the world, but most of the time, the answer is yes. I can make two loaves of bread for about half the cost of the same bread in the store.
How can I make my bread tasty?
You can make your bread tasty by using the best ingredients. If you use old flour with little texture, your bread won’t be as flavorful as if you use fresh, wholemeal flour. You can get excellent results with just a simple recipe, like this tasty crusty bread recipe.
How do you make big bubbles in bread?
The air pockets in bread are made when the gluten in the bread is activated and sticks together. You get these by using flour that is rich in protein, kneading your bread for a long time, and doing both a cold and a warm rise of the bread.
What’s the best bread recipe ever?
Is this a trick question? The best recipe depends on what *your* favorite bread is. For me, that’s sourdough bread, with lots of love put into it. With that said, a bread roll made by a toddler’s hands with just a little too much flour can be just as delicious.
To me, the best bread is made from:
- A pint of water
- A pint of flour
- A little yeast
- Salt
Combine your ingredients, leave the dough overnight to rise, and bake it the next day in a Dutch oven – you can find the full recipe here. To me, that’s the best bread in the world.
A Final Word On Breadmaking
Making your own bread is completely doable. You don’t need to stress about it. Try it out some of our simple recipes, and you’ll gain more confidence with every loaf of bread.
If you want to go all-in and learn all about baking with sourdough (and save yourself many hours of trial and error), I recommend this course from my friend Victoria over at A Modern Homestead.
Happy breadmaking! Let us know how your first loaf turns out in the comments.
love how you are straight to it, like me, funny
Thank you, Janet.. Im glad you liked it 🙂
I’ve always been insecure and nervous about this, but this written so plainly as a country girl sounds just so easy I am for sure going to trial this thank you for posting
Oh yay! That makes me so happy! Thank you for saying that. Baking really is one of my go to for relaxation! But that was not always the case – I used to not be able to make it work (and I still mess up sometimes!) but it really is a great way of slowing down and making something that the whole family enjoys! Do let me know if you bake anything! I would love to see it!
I have been struggling with getting my dough to rise. I really think it’s the yeast. What are some good tips for getting my dough to rise??
Oh Its hard when I havent seen what you have been working with but here is what comes to mind:
Dry yeast needs to be activated. This means that you have to put it in water and allow it to soak up water and stir it really really well before you use it in your recipe. You can tell that its ready to be worked with because it has incorporated completely into the water that you have poored it into and it has started to create small bubbles on the surface of the water.
I hope this helps – if not let me know what recipe you used, and what steps you took, then maybe we can work it out together.
I measured 3 cups flour, 1.5 c water salt and yeast and my dough was so wet and incredibly sticky, so I looked up tips and added flour slowly over a course of 10 minutes until it was manageable and not sticking to everything. My question today; is it ok to have to add more flour like that? When I’ve already added the set amount of yeast and salt.
Hi Ashlley. Thank you for asking this! YES – flour is tricky to put as an exact measure in a recipe, because sometimes there is a little more moisture in the flour and you need less water, sometimes you need more… What you did here is exactly what I would have done!
Once you bake it, you will be able to adjust the recipe to fit your life better for next time. But well done for trouble shooting on the go! Let me know how it was.
Best, Malene.